Upgrading your home’s lighting can dramatically transform a room’s ambiance and functionality. Installing a new ceiling light fixture might seem like a daunting electrical task, but with the right guidance and a commitment to safety, it’s a rewarding DIY project accessible to most homeowners. This comprehensive guide will walk you through every step, from gathering your tools to flipping the switch on your beautifully installed light, ensuring a safe and successful outcome for your home.
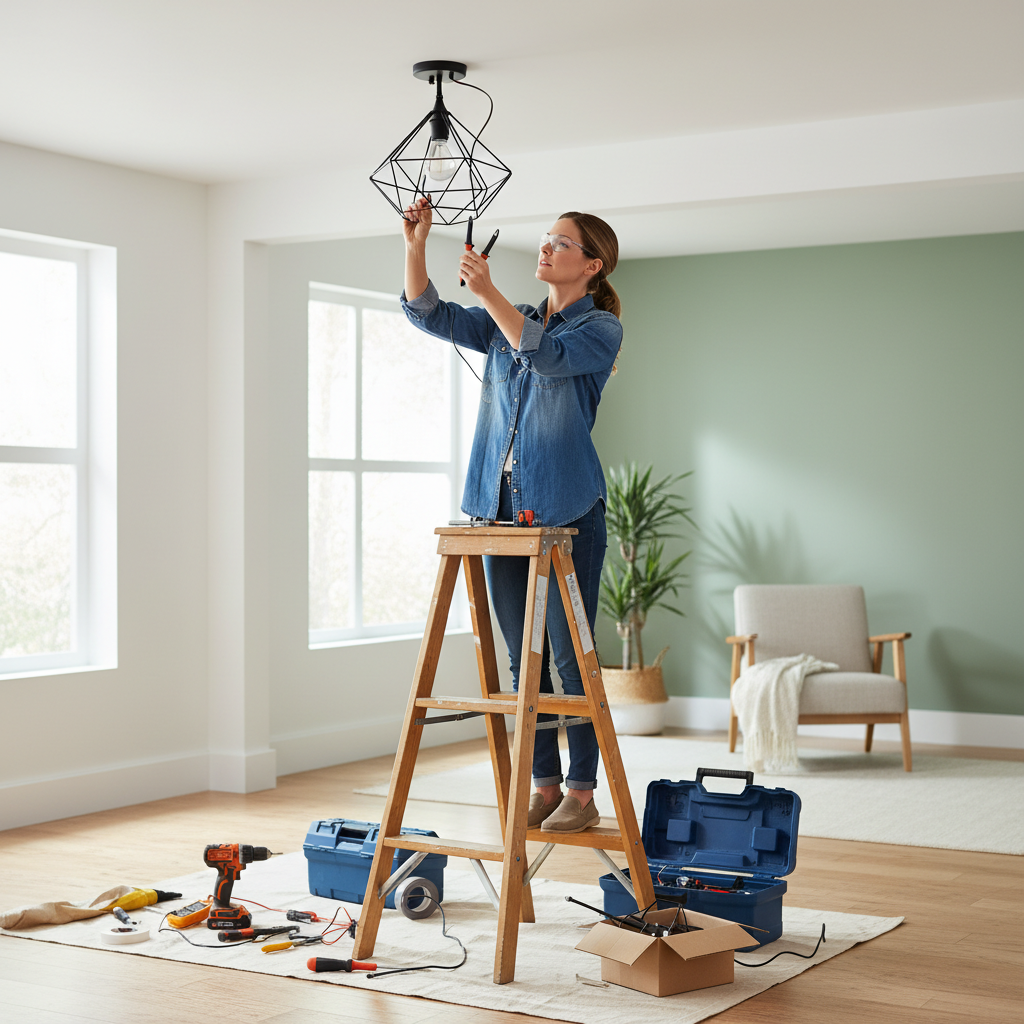
Essential Tools and Materials for a Smooth Installation
Before you begin, gathering all necessary tools and materials is crucial for a streamlined and safe process. Having everything at hand prevents interruptions and ensures you can focus on the task.
Here’s a checklist of what you’ll typically need:
- Screwdrivers: Both Phillips-head and flat-head for various screws.
- Wire Cutters/Strippers: To neatly cut and strip insulation from electrical wires.
- Pliers: Especially needle-nose pliers, for bending and gripping wires.
- Non-Contact Voltage Tester: An indispensable safety tool to detect live electrical current.
- Sturdy Ladder or Step Stool: To safely reach the ceiling fixture.
- Electrical Tape: For added insulation and securing wire connections.
- Wire Nuts/Connectors: To safely join electrical wires. Your new fixture usually includes these.
- New Light Fixture: Ensure it comes with all its mounting hardware.
- Work Light/Headlamp (Optional): To illuminate your workspace, especially if you’re replacing the only light source.
- Helper (Recommended): For heavier fixtures, an extra set of hands can significantly improve safety and ease of installation.
Prioritizing Safety: Crucial Steps Before You Begin
Working with electricity demands the utmost caution. Skipping safety steps can lead to severe injury or damage. Always make safety your top priority when learning how to install a ceiling light fixture.
Turn Off the Power: This is the most critical step. Locate your home’s main electrical panel (breaker box) and switch off the circuit breaker that controls the light fixture you’ll be working on. Don’t rely solely on the wall switch, as some wiring may still be live. Label the breaker to prevent others from accidentally turning it back on.
Test for Live Wires: After turning off the power, use your non-contact voltage tester to confirm that no electricity is flowing to the fixture’s wires. Touch the tester to each wire you intend to handle. A lack of beeping or flashing indicates the circuit is safe to work on.
Wear Safety Gear: Protect your eyes from falling debris with safety glasses. Wearing work gloves can also offer an additional layer of protection.
Check Junction Box Weight Limits: Before mounting your new fixture, ensure the existing electrical junction box in the ceiling can support its weight. Heavy chandeliers or large fixtures may require a specialized, reinforced junction box secured to a ceiling joist. Never hang a heavy fixture from a weak or damaged box.
Read Manufacturer’s Instructions: Every light fixture is unique. Always consult the installation instructions provided by the manufacturer for specific details and requirements.
Step-by-Step Guide to Installing Your New Ceiling Light Fixture
With safety measures in place and tools ready, you’re prepared to install your new light fixture. Follow these steps carefully for a successful DIY ceiling light installation.
1. Prepare the Area and Turn Off Power
|
Our Picks for the Best Living room ceiling light in 2026
As an Amazon Associate I earn from qualifying purchases.
|
||
| Num | Product | Action |
|---|---|---|
| 1 | Amico 24 Pack 6 Inch 5CCT Ultra-Thin LED Recessed Ceiling Light with Junction Box, 1050LM Brightness, Dimmable Canless Wafer Downlight, 12W, ETL&FCC |

|
| 2 | Modern LED Ceiling Light 7 Rings Dimmable Fixtures with Remote Black Close to Ceiling Light 31.8" 130W 3000K-6500K Flush Mount Ceiling Lamp for Living Room,Bedroom,Kitchen |
|
| 3 | MEIXISUE Gold Modern Sputnik Chandelier Ceiling Light Fixtures,6-Lights Industrial Metal Semi Flush Mount Ceiling Light for Bedroom Dining Room Living Room Kitchen Hallway UL Listed |
|
| 4 | 33" Modern Chandelier Ceiling Light Fixture, 12-Light Sputnik Chandeliers Brushed Gold and Black Mid Century Chandelier Over Table, Height Adjustable Chandeliers for Dining Room Living Room Kitchen |
|
| 5 | Shine LUEST Modern LED Ceiling Light, Dimmable LED Chandelier Flush Mount Ceiling Lights, Remote Control Acrylic Ring Ceiling Lamp Fixture for Living Room Dining Room Bedroom (White, 8 Rings) |
|
| 6 | Modern LED Ceiling Light for Bedroom 31.5" Black Kitchen Lighting Fixtures Ceiling 3000-6500K Dimmable Square Ceiling Light with Remote Control for Living Room, Dining Room, Kitchen |
|
| 7 | 36W Modern LED Ceiling Light Fixture, 19.7Inch Curved Wave Ceiling Lamp with Remote for Bedroom, Kitchen, Hallway, Foyer Library Dining Room Silver 6000K Modern Ceiling Light Fixture |
|
| 8 | RUIYEY Modern Chandelier Ceiling Light Fixture Sputnik Chandeliers Gold and Black Farmhouse Chandelier Over Table 12-Light Height Adjustable Chandeliers for Dining Room, Living Room,Kitchen Island |
|
| 9 | Modern Ceiling Light, 36.2'' LED Dimmable Acrylic Square 6+1 Rings Ceiling Lights with Remote, Black Flush Mount Ceiling Light Fixture for Low Ceiling Bedroom Living Room Dining Room, 130W |
|
| 10 | Shine LUEST Modern LED Ceiling Light Fixture Black Kitchen Lighting Fixtures Ceiling for Bedroom 31.5" Dimmable 6 Ring Square Ceiling Light for Kitchen with Remote Control for Living Room,Dining Room |
|
Go to your electrical service panel and switch off the circuit breaker for the room where you’ll be working. Double-check by flipping the light switch in the room; the existing light should not turn on. If there’s an existing fixture, use a non-contact voltage tester on the wires to confirm the power is off before touching anything. This ensures maximum safety.
2. Remove the Old Fixture (If Applicable)
Carefully unfasten the old fixture from the ceiling. This usually involves unscrewing nuts or screws holding it in place. Once loose, gently lower it to expose the wiring. Disconnect the wires by twisting off the wire nuts, separating the black, white, and ground wires. Remove the old mounting bracket as well, as your new fixture will likely come with its own.
3. Install the New Mounting Bracket
Your new light fixture will come with a mounting bracket designed to fit its specific design. Attach this bracket to the electrical junction box in the ceiling using the screws provided. Ensure it is securely fastened and can support the weight of the new fixture. For heavier fixtures, confirm the junction box itself is securely anchored to a ceiling joist.
4. Assemble the New Fixture (If Needed)
Some light fixtures require minor assembly before wiring. Follow the manufacturer’s instructions to attach arms, shades, or other decorative elements to the main body of the fixture. It’s often easier to do this on the ground before lifting the fixture to the ceiling.
5. Connect the Wiring
This is the most critical part of the installation. Match the wires from the ceiling to the wires on your new fixture:
- Black to Black: The black wire from the ceiling (hot wire) connects to the black wire of the fixture.
- White to White: The white wire from the ceiling (neutral wire) connects to the white wire of the fixture.
- Ground to Ground: The bare copper or green insulated wire from the ceiling (ground wire) connects to the green or bare copper wire on the fixture’s mounting bracket or the fixture itself.
To make a connection, strip about ¾ inch of insulation from each wire end if necessary. Hold the stripped ends of corresponding wires parallel, then twist a wire nut over them clockwise until tight. Give each wire a gentle tug to ensure a secure connection. For extra security, you can wrap electrical tape around the wire nuts and connections.
6. Secure the New Fixture
Carefully tuck all connected wires into the electrical junction box. Lift the new light fixture and align it with the mounting bracket you installed earlier. Use the screws or decorative nuts provided to firmly attach the fixture to the bracket. Ensure the fixture sits flush against the ceiling and is stable. If you have a heavy fixture, this is where a helper is invaluable to hold it while you secure it.
7. Install Bulbs and Trim/Cover
Screw in the recommended light bulbs, paying attention to the maximum wattage specified on the fixture. Then, attach any decorative covers, globes, or trim pieces according to the manufacturer’s instructions. Handle glass components with care.
8. Restore Power and Test
Once everything is securely in place, return to your electrical panel and flip the circuit breaker back to the “on” position. Then, go back to the room and turn on the light switch. Your new ceiling light fixture should illuminate, brightening your space.
Common Installation Mistakes and How to Avoid Them
Even experienced DIYers can make mistakes. Being aware of common pitfalls can save you time, frustration, and potential safety hazards during your ceiling light fixture installation.
1. Not Checking Junction Box Weight Limits: Many homeowners overlook the importance of the electrical box’s weight rating. A standard box might only support a few pounds, whereas heavier fixtures like chandeliers require a fan-rated box securely mounted to a ceiling joist. Always verify your box can handle your fixture’s weight.
2. Skipping Electrical Safety Checks: Rushing to turn off power or neglecting to use a voltage tester can lead to dangerous electrical shocks. “Always turn off the power at the circuit breaker and use a voltage tester before starting any work to avoid electrical shocks.” This step is non-negotiable for personal safety.
3. Incorrect Wiring: Reversing hot and neutral wires can cause flickering, damage the fixture, or create a shock hazard. Always connect black to black, white to white, and ground to ground. If you’re unsure about the existing wiring colors, consult an electrician.
4. Not Securely Mounting the Fixture: A wobbling or loosely mounted fixture is not only unsightly but dangerous. Ensure all screws are tightened, and the fixture is flush against the ceiling. “Neglecting to properly secure the fixture can lead to wobbling, which is not only unsightly but dangerous.”
5. Exceeding Maximum Wattage: Using light bulbs with a higher wattage than the fixture is rated for can cause overheating, damage the fixture, and even pose a fire risk. Always check the fixture’s specifications and use appropriate bulbs.
6. Ignoring Manufacturer Instructions: Each fixture has unique requirements. Deviating from the provided guide can lead to installation errors or void warranties. Always read the instructions carefully before and during installation.
Troubleshooting Your New Light Fixture
You’ve installed your light, but it’s not working. Don’t panic! Most issues are minor and easily fixable.
Light Doesn’t Work
- Check the Bulb: Ensure the bulb is screwed in tightly and isn’t burnt out. Sometimes constant use can loosen bulbs.
- Examine the Socket Tab: With the power off, check the metal tab at the bottom of the socket. If it’s flattened, carefully bend it up slightly to ensure good contact with the bulb.
- Verify Wiring Connections: Turn off the power at the breaker. Recheck all wire connections at the fixture, making sure they are tight and correctly matched (black to black, white to white, ground to ground). Loose connections are a common culprit.
Light Flickers
- Loose Bulb: Again, check if the bulb is screwed in tightly.
- Faulty Switch: If the bulb flickers on and off, or you hear sizzling from the switch, the wall switch contacts might be bad and need replacement.
- Loose Wiring Connections: As with a non-working light, flickering can often stem from loose wire connections at the fixture, the switch, or even the breaker panel. Always power off before inspecting.
“If the light doesn’t come on, turn off both the switch and the circuit, and check your wiring connections.” – Lowe’s Home Improvement Expert, Lighting Installation Guide
Conclusion
Installing a new ceiling light fixture is an achievable DIY project that can significantly refresh your home’s aesthetic. By carefully following the step-by-step instructions, prioritizing electrical safety, and knowing how to troubleshoot common issues, you can confidently undertake this upgrade. Remember to gather your tools, turn off the power, connect wires correctly, and securely mount your fixture for a brilliant and safe result. With a little patience and attention to detail, you’ll enjoy the glow of your new light in no time. Are you ready to brighten up your space with a new fixture?
Câu Hỏi Thường Gặp
How long does it typically take to install a ceiling light fixture?
For most straightforward replacements, installing a ceiling light fixture typically takes 30 minutes to an hour. However, this can vary based on your experience level, the complexity of the new fixture, and whether you’re replacing an existing light or installing a new one where no fixture was before.
Do I need an electrician to install a ceiling light fixture?
While many homeowners can tackle ceiling light installation as a DIY project, it’s always recommended to consult a licensed electrician if you’re unsure about any step, dealing with outdated or complicated wiring, or installing a very heavy fixture that requires specialized support. Safety is paramount when working with electricity.
What if my new fixture is heavier than the old one?
If your new fixture is significantly heavier, you must verify that your existing electrical junction box can support the increased weight. Standard boxes might not suffice. For heavy fixtures like large chandeliers, you may need to install a heavy-duty, fan-rated junction box directly anchored to a ceiling joist for secure support.
Can I install a dimmer switch with my new ceiling light?
Yes, you can often install a dimmer switch with your new ceiling light, but you must ensure both the light fixture and the bulbs you choose are “dimmable.” Not all bulbs or fixtures are compatible with dimmer switches, and using incompatible components can lead to flickering or damage.
What are the standard wire colors for ceiling lights?
In most homes, you’ll find three wire colors: black, white, and bare copper (or green). The black wire is the “hot” or live wire, the white wire is the “neutral” wire, and the bare copper or green wire is the “ground” wire. Always connect corresponding colors for safe and proper operation.