Old brass fixtures, while once a staple in many homes, often present a dated aesthetic that can detract from a modern interior. But what if you could transform these tarnished relics into sleek, contemporary black accents without the hefty cost of replacement? This comprehensive DIY guide will walk you through every step of painting your old brass fixtures black, ensuring a durable, professional-looking finish that breathes new life into your space. Get ready to embrace the power of paint and reimagine your home’s hardware with confidence and creativity.
Why Transform Your Brass Fixtures?
Updating the look of your home doesn’t always require a complete overhaul or expensive new purchases. Old brass fixtures, whether they are light fixtures, door handles, or cabinet pulls, can often appear yellowed, tarnished, or simply out of sync with current design trends. Painting them black is a cost-effective and impactful way to achieve a dramatic transformation. This DIY approach allows you to customize your existing pieces, giving them a modern, industrial, or minimalist edge that perfectly complements your evolving home decor. It’s an accessible project that can significantly elevate the style and perceived value of your living space without breaking the bank.
Essential Tools & Materials for Your DIY Project
Before diving into the transformation, gathering the right tools and materials is crucial for a smooth and successful project. Having everything ready beforehand ensures you can move through each step efficiently and achieve the best possible results.
Here’s what you’ll need:
- Screwdriver set or appropriate tools: For safely removing fixtures.
- Drop cloths or old newspapers: To protect your work area from paint and debris.
- Painter’s tape: For masking off any areas you don’t want painted.
- Degreaser or all-purpose cleaner: To remove dirt, grease, and grime.
- Warm water and soap: For a thorough initial cleaning.
- Steel wool (fine grade) or fine-grit sandpaper (100-320 grit): To rough up the surface for paint adhesion.
- Tack cloth or lint-free rags: For wiping away dust and residue.
- Denatured alcohol or mineral spirits: For a final clean and degrease.
- Metal-specific primer (e.g., self-etching or oil-based): Essential for paint adhesion on slick brass.
- Black spray paint (enamel, acrylic, or oil-based, suitable for metal): Choose a finish (matte, satin, semi-gloss) that suits your style.
- Clear protective topcoat (e.g., clear lacquer, polyurethane, or metal sealant): For added durability and chip resistance.
- Gloves and safety glasses: For personal protection.
- Respirator or face mask: For proper ventilation, especially with spray paints.
Step-by-Step Guide to Painting Brass Fixtures Black
Transforming your old brass fixtures into stylish black accents is a rewarding DIY project that can significantly update your home’s aesthetic. The key to a long-lasting, professional finish lies in careful preparation and methodical application. Follow these steps closely to ensure your painted brass fixtures look fantastic and stand the test of time.
Step 1: Disassembly & Thorough Preparation
The foundation of any successful paint job is meticulous preparation. This stage is critical for ensuring the paint adheres properly and endures daily wear and tear.
- Safety First – Disassemble the Fixture: Begin by safely removing the brass fixture from its location. For electrical items like light fixtures, always turn off the power at the circuit breaker first. Disassemble as many components as possible. This makes cleaning, sanding, and painting much easier and helps you achieve a uniform finish without awkward angles or missed spots. Store screws and small parts in a labeled bag to avoid loss.
- Initial Cleaning: Start by giving all brass components a good scrub with warm, soapy water and an all-purpose cleaner or degreaser. This will remove superficial dirt, grime, and any built-up residue. Rinse thoroughly and dry completely with a clean cloth to prevent water spots or rust.
- Roughing Up the Surface: Brass is a smooth, non-porous metal, which means paint struggles to adhere without a bit of help. Use fine-grade steel wool or fine-grit sandpaper (100-320 grit) to lightly scuff the entire surface of the brass. This creates a “tooth” or slight texture that the primer can grip onto. Focus on an even scuff, not deep scratches.
- Final Degreasing: After sanding, wipe down all surfaces with a tack cloth to remove any sanding dust. Then, use denatured alcohol or mineral spirits on a clean, lint-free rag to thoroughly degrease the brass. This removes any remaining oils, fingerprints, or contaminants that could prevent proper adhesion. Allow the solvent to evaporate completely before moving on.
|
Our Picks for the Best Living room ceiling light in 2026
As an Amazon Associate I earn from qualifying purchases.
|
||
| Num | Product | Action |
|---|---|---|
| 1 | Modern LED Ceiling Light for Bedroom 31.5" Black Kitchen Lighting Fixtures Ceiling 3000-6500K Dimmable Square Ceiling Light with Remote Control for Living Room, Dining Room, Kitchen |

|
| 2 | Shine LUEST Modern LED Ceiling Light Fixture Black Kitchen Lighting Fixtures Ceiling for Bedroom 31.5" Dimmable 6 Ring Square Ceiling Light for Kitchen with Remote Control for Living Room,Dining Room |
|
| 3 | 36W Modern LED Ceiling Light Fixture, 19.7Inch Curved Wave Ceiling Lamp with Remote for Bedroom, Kitchen, Hallway, Foyer Library Dining Room Silver 6000K Modern Ceiling Light Fixture |
|
| 4 | RUIYEY Modern Chandelier Ceiling Light Fixture Sputnik Chandeliers Gold and Black Farmhouse Chandelier Over Table 12-Light Height Adjustable Chandeliers for Dining Room, Living Room,Kitchen Island |
|
| 5 | Modern LED Ceiling Light 7 Rings Dimmable Fixtures with Remote Black Close to Ceiling Light 31.8" 130W 3000K-6500K Flush Mount Ceiling Lamp for Living Room,Bedroom,Kitchen |
|
| 6 | Shine LUEST Modern LED Ceiling Light, Dimmable LED Chandelier Flush Mount Ceiling Lights, Remote Control Acrylic Ring Ceiling Lamp Fixture for Living Room Dining Room Bedroom (White, 8 Rings) |
|
| 7 | MEIXISUE Gold Modern Sputnik Chandelier Ceiling Light Fixtures,6-Lights Industrial Metal Semi Flush Mount Ceiling Light for Bedroom Dining Room Living Room Kitchen Hallway UL Listed |
|
| 8 | Modern Ceiling Light, 36.2'' LED Dimmable Acrylic Square 6+1 Rings Ceiling Lights with Remote, Black Flush Mount Ceiling Light Fixture for Low Ceiling Bedroom Living Room Dining Room, 130W |
|
| 9 | 33" Modern Chandelier Ceiling Light Fixture, 12-Light Sputnik Chandeliers Brushed Gold and Black Mid Century Chandelier Over Table, Height Adjustable Chandeliers for Dining Room Living Room Kitchen |
|
| 10 | Amico 24 Pack 6 Inch 5CCT Ultra-Thin LED Recessed Ceiling Light with Junction Box, 1050LM Brightness, Dimmable Canless Wafer Downlight, 12W, ETL&FCC |
|
Step 2: Priming for Lasting Adhesion
Primer acts as a bridge between the slick brass and your chosen black paint, ensuring a strong bond and preventing chipping or peeling down the line.
- Masking Off Areas: Use painter’s tape to carefully mask off any parts of the fixture you don’t want to be painted, such as electrical components, threaded areas, or decorative elements you wish to keep brass. Precision here will contribute to a neat final look.
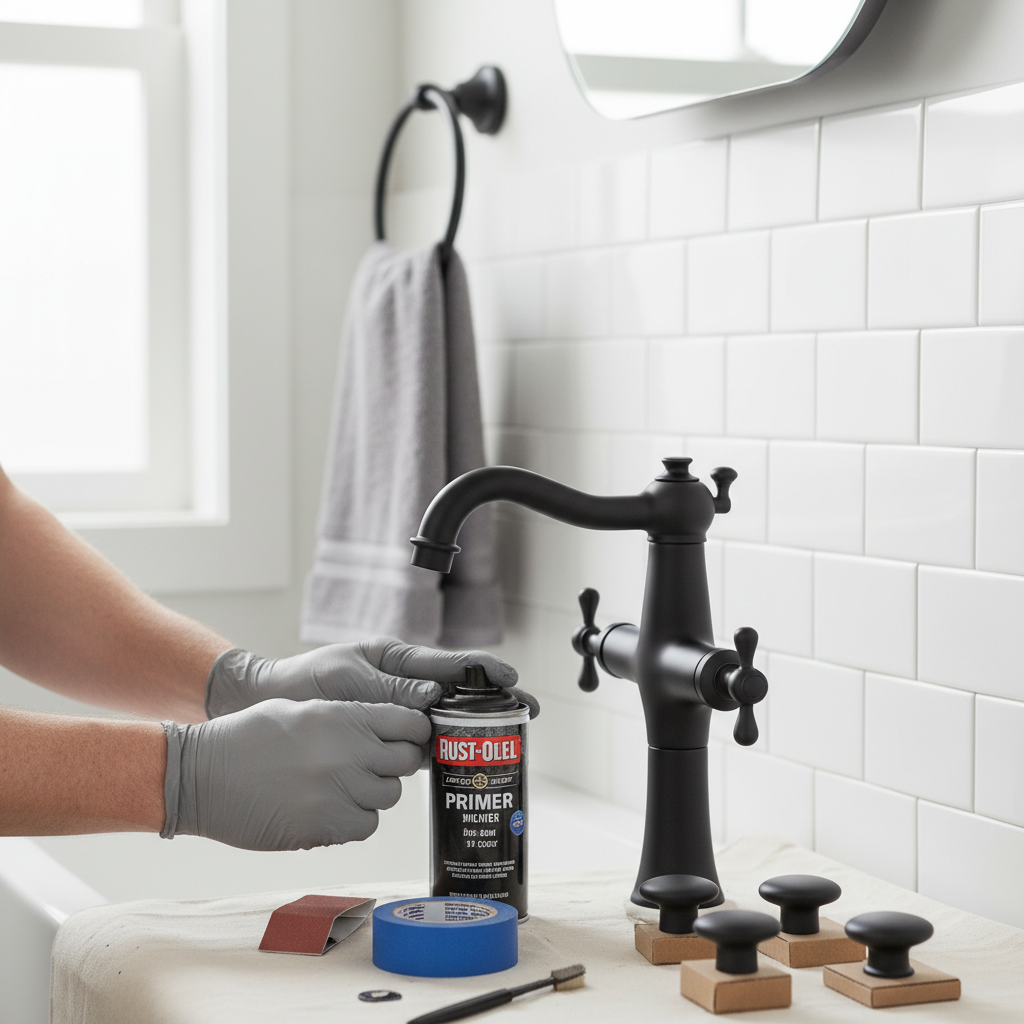
- Applying Metal-Specific Primer: In a well-ventilated area (ideally outdoors or in a designated spray booth), lay your disassembled brass pieces on a drop cloth. Apply a thin, even coat of metal-specific primer. Self-etching or oil-based primers are excellent choices for brass as they are formulated to bond exceptionally well with metal surfaces. Hold the can about 8-12 inches away and use sweeping motions to avoid drips.
- Drying and Second Coat: Allow the first coat of primer to dry completely according to the manufacturer’s instructions, which typically takes at least 30 minutes to an hour. Applying a second thin coat of primer is highly recommended for optimal adhesion and coverage, especially if the brass was very shiny or unevenly scuffed. Let this coat dry thoroughly, usually for several hours or even overnight, before proceeding.
Step 3: Applying the Black Finish
Now for the exciting part – transforming your brass with a sleek black finish!
- Choosing the Right Black Spray Paint: Select a black spray paint that is specifically designed for metal, such as an enamel, acrylic, or oil-based formula. These paints offer excellent durability and a wide range of finishes, from matte to high-gloss. Rust-Oleum and Krylon are popular brands with reliable options.
- Technique for Even Coats: With your primed fixture ready, apply the black spray paint in multiple thin, even coats. Avoid the temptation to apply one thick coat, as this often leads to drips, sags, and an uneven finish. Hold the can 8-12 inches from the surface and use smooth, consistent passes. Slightly overlap each pass to ensure full coverage.
- Layering and Drying: Allow each coat to dry to the touch (usually 5-15 minutes) before applying the next. This prevents the paint from becoming tacky and ensures a smooth, uniform surface. Depending on the original color of the brass and the paint’s opacity, you may need 3-5 thin coats to achieve complete, opaque coverage. Always follow the specific drying times recommended on your paint can.
- Achieving a Smooth, Factory-Like Finish: Patience is truly a virtue during this stage. By applying thin, consistent layers and allowing proper drying time between each, you’ll build up a rich, deep black finish that looks professionally done, not hastily spray-painted.
Step 4: Sealing for Durability
A clear protective topcoat is your best defense against scratches, chips, and daily wear, ensuring your newly painted fixtures maintain their beauty for years to come.
- Applying a Clear Protective Topcoat: Once the final coat of black paint is completely dry (wait at least 24 hours, or even longer in humid conditions), apply a clear protective topcoat. Options include clear lacquer, polyurethane, or specialized metal sealants like ProtectaClear. Choose a finish that matches your black paint (e.g., matte clear coat for matte black paint).
- Benefits of Sealing: This topcoat creates a hard, durable barrier that protects the painted surface from abrasion, moisture, and UV damage, which can cause fading or degradation over time. It significantly enhances the longevity and resilience of your DIY project.
- Proper Application and Drying: Apply the clear coat in 2-3 thin, even layers, just as you did with the primer and black paint. Allow adequate drying time between coats and let the final coat cure fully before handling the fixture excessively. This curing process can take several days to a week, so avoid reassembling or heavy use during this period.
Step 5: Reassembly & Enjoyment
Once the clear coat has fully cured, it’s time to bring your transformed fixture back to life.
- Putting the Fixture Back Together: Carefully remove all painter’s tape. Reassemble the components of your fixture, referring to any photos you took during disassembly if needed. Handle the pieces gently to avoid any accidental scratches.
- Reinstalling Safely: For electrical fixtures, ensure the power is still off at the circuit breaker. Reinstall the fixture securely, following the manufacturer’s instructions.
- Enjoy the Transformation: Step back and admire your handiwork! Your old brass fixture has been given a stunning, modern upgrade, all thanks to your DIY efforts.
Tips for a Flawless Finish
Achieving a professional-quality finish isn’t just about following steps; it’s about paying attention to detail and embracing certain practices that elevate your results.
- Patience is Key: Rushing through any stage, especially drying times, is the most common cause of poor results. Allow each coat to dry completely. A little extra waiting time can prevent bubbles, drips, and peeling down the road.
- Ventilation and Environment: Always work in a well-ventilated area to avoid inhaling paint fumes. A garage with an open door or outdoors on a calm, low-humidity day is ideal. Avoid painting in direct sunlight or extreme temperatures, which can affect paint drying and adhesion. Creating a makeshift spray booth with a large cardboard box can help minimize dust and overspray.
- Practice on Scrap if Unsure: If you’re new to spray painting or unsure about your technique, test your primer and paint on a piece of scrap metal first. This allows you to get a feel for the spray pattern and distance without risking your actual fixture.
- Addressing Drips and Runs: If you notice a drip or run while painting, resist the urge to touch it immediately. Let the paint dry completely. Once dry, you can lightly sand the imperfection with very fine-grit sandpaper (e.g., 400-600 grit) and then apply another light coat of paint. Early intervention can often make it worse.
“The secret to a stunning painted finish isn’t just the paint itself, but the meticulous preparation that happens before the first spray. Skipping steps there is like building a house on sand.” – Sarah Miller, DIY Renovation Expert
Troubleshooting Common Issues
Even with careful planning, DIY projects can sometimes encounter unexpected challenges. Knowing how to troubleshoot common painting issues can save your project.
- Paint Chipping or Peeling: This is almost always due to inadequate surface preparation. Ensure you thoroughly cleaned, degreased, and scuffed the brass surface, and used a metal-specific primer. To fix, you’ll need to sand down the affected areas (or the entire piece if widespread), re-prime, and repaint.
- Uneven Coverage or Streaks: This usually happens when paint is applied too thickly, too thinly, or with inconsistent spray patterns. Ensure you’re using even, sweeping motions, holding the can at a consistent distance, and applying multiple thin coats. For existing issues, allow to dry, lightly sand, and apply additional light coats.
- Bubbling or Crinkling: Bubbles can form if the surface wasn’t perfectly clean, if the paint was applied in humid conditions, or if incompatible paints/primers were used. Crinkling (or “alligatoring”) often occurs when a new coat of paint is applied over a previous coat that hasn’t fully cured, or if there’s a reaction between different paint types. If the issue is severe, you may need to strip the paint, clean, and start over. For minor bubbles, a light sanding and repaint might suffice.
Conclusion
Transforming your old brass fixtures into modern black showpieces is a highly gratifying DIY endeavor. By following this detailed guide, you’ve learned the critical steps from meticulous preparation and expert priming to flawless painting and durable sealing. This project not only saves money but also injects a personalized touch and contemporary flair into your home. The next time you spot an outdated brass fixture, remember the potential it holds for a stunning, cost-effective makeover. What other brass elements in your home are just waiting for a black transformation?
Frequently Asked Questions
Do I really need to prime brass before painting it black?
Yes, priming brass is crucial for a durable finish. Brass is a smooth, non-porous metal, and primer (especially a metal-specific or self-etching one) creates a rougher surface for the paint to adhere to, preventing chipping and peeling over time.
What kind of black paint is best for brass fixtures?
For the best results, use an enamel, acrylic, or oil-based spray paint that is specifically formulated for use on metal. These paints offer superior adhesion, durability, and a smooth finish, making brands like Rust-Oleum or Krylon excellent choices for your project.
How long does painted brass last, and how can I make it more durable?
With proper preparation, priming, and a protective clear coat, painted brass fixtures can last for many years. To maximize durability, ensure all coats (primer, paint, clear coat) are applied thinly and allowed to fully cure according to manufacturer instructions. A high-quality clear lacquer or polyurethane topcoat significantly enhances resistance to wear and tear.
Can I paint brass fixtures while they are still installed?
While technically possible, it is strongly advised to remove and disassemble fixtures before painting. This allows for thorough cleaning, sanding, and even paint application to all surfaces, preventing drips, missed spots, and accidental overspray on surrounding areas. Safety, especially with electrical fixtures, is also a major concern.
What should I do if my painted brass fixture starts to chip?
If chipping occurs, it usually indicates a problem with surface preparation or inadequate clear coat application. For minor chips, lightly sand the chipped area, clean it, re-prime if necessary, and apply touch-up coats of black paint and clear coat. For extensive chipping, it’s best to strip the paint entirely and restart the process from scratch.